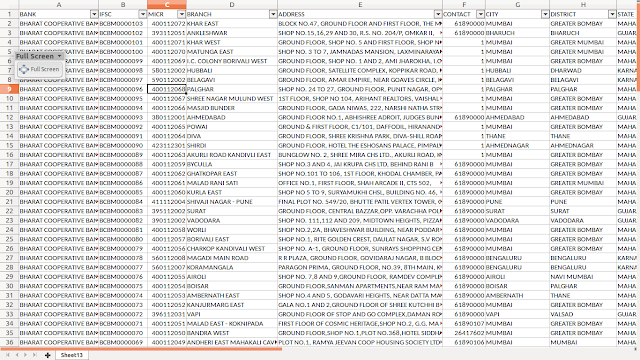
This article will discuss the following topics, Blogger's REST APIs. Google's OAuth 2.0 playground. Accessing spreadsheet in Python. Creating blogger posts via Python. An experiment to automate blog post creation when you have structured data. I was searching for IFSC codes for some bank transactions and came across Reserve Bank's website, which has a list of Excel files containing Bank Codes, Contact Info and related details of each bank's branch. This time I will be looking towards Bharat co-operative bank of Mumbai. Here is how the corresponding data looks like. In the above picture, each row represents lots of details about each branch of the Bank. Let's think of creating a list of blog posts where each post gives IFSC codes of a particular branch along with address and contact details. As the first step, I have created a blog in blogger. In the Blogger dashboard, please also note the parameter called blog ID which is a kind of unique identifier ...
Flux vs Argo CD in GitOps: Which One is Right for You? In the context of GitOps , both Flux and Argo CD are popular tools for continuous deployment (CD) automation. They manage Kubernetes applications using Git as the source of truth. While both are great options, they differ in several aspects, from architecture to feature sets. In this post, we’ll compare Flux and Argo CD to help you decide which is the right tool for your Kubernetes environment. 1. Architecture Flux: Flux is a pull-based system that continuously reconciles the state of the cluster with the state in Git. It watches your Git repositories and automatically updates Kubernetes resources when it detects changes. Flux is lightweight and integrates with the CNCF ecosystem. It also supports Kustomize and Helm natively. Argo CD: Argo CD is also a pull-based tool but provides a declarative user interface for visual feedback on application status, health, and syncing. Ar...
Understanding Swagger and OpenAPI Specifications In modern API development, Swagger and OpenAPI have become the go-to tools for designing, documenting, and interacting with RESTful APIs. Let’s break down these essential tools and how they simplify API development. What is OpenAPI? The OpenAPI Specification (OAS) is a standard format to describe REST APIs. Initially known as the Swagger Specification, it was created by Swagger, then donated to the OpenAPI Initiative in 2015. Today, OpenAPI has become the industry standard for describing APIs, making it easier for developers to understand and work with APIs across various platforms. An OpenAPI document provides a structured description of the entire API, including: Endpoints and available operations Input parameters and output formats Authentication methods Error messages and responses Here’s a quick example of an OpenAPI specification snippet in JSON: { ...
Adding Multiple SSH Keys to Your Raspberry Pi If you're a Raspberry Pi enthusiast, you know the importance of secure access to your device. Using SSH keys is a secure and convenient way to manage remote access. In this guide, I'll show you how to add multiple SSH keys to your Raspberry Pi, allowing different users or machines to connect securely. Step 1: Generate SSH Keys First, you need to generate SSH keys on each client machine that will access your Raspberry Pi. Open a terminal on your client machine and run the following command: ssh-keygen -t rsa -b 4096 -C "your_email@example.com" Follow the prompts to save the key in the default location ( ~/.ssh/id_rsa ) and optionally add a passphrase for extra security. Step 2: Copy SSH Keys to Raspberry Pi Next, you need to copy the SSH key to your Raspberry Pi. The easiest way to do this is by using the ssh-copy-id command. Replace pi@raspberrypi with your...
Managing Multiple SSH Keys for Different Machines In today's interconnected world, it's common to access multiple remote machines via SSH. However, managing different SSH keys for various machines can be a bit challenging. This blog post will guide you through the process of generating and adding multiple SSH keys on a single computer, making your workflow seamless and efficient. Step 1: Generate SSH Keys To start, we'll generate a unique SSH key for each machine. Open your terminal and use the ssh-keygen command: ssh-keygen -t rsa -b 4096 -C "your_email@example.com" -f ~/.ssh/id_rsa_machine1 ssh-keygen -t rsa -b 4096 -C "your_email@example.com" -f ~/.ssh/id_rsa_machine2 Replace machine1 and machine2 with appropriate identifiers for your machines. Step 2: Add SSH Keys to the SSH Agent Next, we need to add these keys to the SSH agent, which manages your SSH keys ...
Comments
Post a Comment